Rename built-in Administrator Account in Windows 8 / 7
Windows includes a built-in Administrator account, sometimes referred to as the Super Administrator account, which is often targetted at by computer hackers and malware with malicious intent. It may therefore be a good idea to rename this Administrator account in your Windows system.

Rename Administrator Account in Windows
If you wish to rename your Administrator account, you may follow any one of these steps.
1] From the Windows 8.1 WinX Menu, open the Computer Management console. Expand Local Users and Groups > Users. Now in the middle pane, select and right-click on the administrator account you wish to rename, and from the context menu option, click on Rename. You can rename any Administrator account this way.
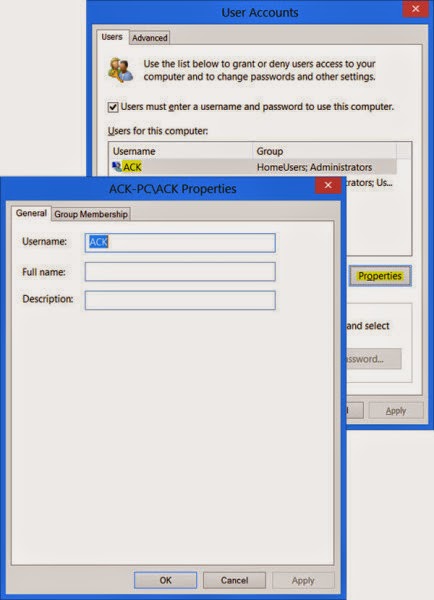
2] You can use a Control Panel applet to rename the administrator account. To sue this way, Run Control UserPasswords2 and hit Enter.
Under the Users tab, select the username and click on the Properties button. You will be able to rename it under the General tab. This method will let you rename an Administrator account which is active and enabled.
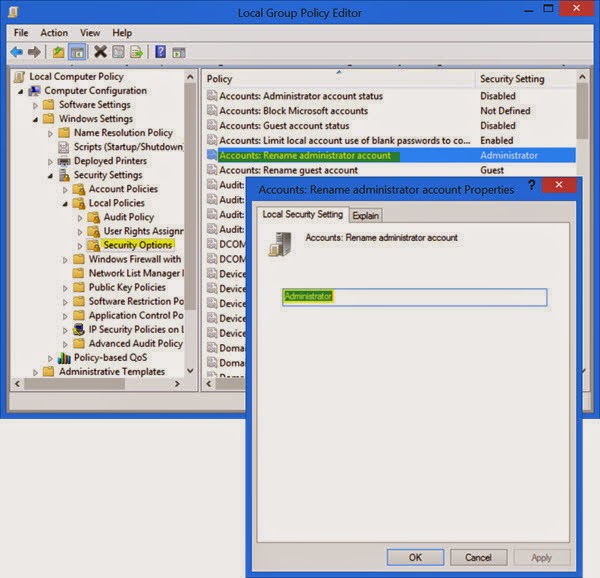
3] If your Windows OS has the Group Policy Editor, do the following. Run gpedit.msc to open the Local Group Policy Editor. Next, navigate as follows: Computer Configuration > Windows Settings > Security Settings > Local Policies, and select Security Options
Find Accounts: Rename administrator account, and double-click on it.
This security setting determines whether a different account name is associated with the security identifier (SID) for the account Administrator. Renaming the well-known Administrator account makes it slightly more difficult for unauthorized persons to guess this privileged user name and password combination.
In the configuration box which opens, under the Local Security Setting tab, you will be able to rename Administrator in the text box. Click Apply > OK and Exit. Using this method you will be able to rename the built-in Administrator account.
4] You can also use the command line to rename the admin account. Open an elevated command prompt window and use the following command for WMIC utility, replacing CustomAdminname with your desired name.
wmic useraccount where name='Administrator' call rename name='CustomAdminName'
5] RenameUser is a free tool that will help you rename administrator accounts. You can download it from here.
Since it is the administrator user account you will be dealing with, please be careful when you rename it. If need be, make a note of the new name and password on a piece of paper.


